Tuesday, September 27, 2011

How to Decorate a Mantle for Fall. It doesn’t have to be Orange! :)


THIS ONE!

I decided to decorate my mantle for fall this year in greens, blues and vintage ironstone.…who said you have to use brown and orange?! :0)

how to decorate your mantle

See the old lantern?  That was my great grandfather’s barn lantern….he would use it every morning to go to the barn and check on what was going on around the farm.  I love using things from my family!  The ironstone bowl was a purchase from a friend after they dissolved her mother in laws estate…it’s so old and I adore it!

vintage ironstone

The old windows behind the ironstone pots came from the old 1916 house I got to go through and glean things from.  They were the old transom windows above the doors…I grabbed three of them! (ok..I didn’t grab them, I took a ladder and had to painstakingly remove them with a screwdriver…but it was SO worth it!) 

The old window that’s behind the wreath was a gift from my mom. She was in line at the bank and a guy had a truck bed full of old windows.  Oh YES SHE DID…she rolled down her window and asked him what he was going to do with them…he was going to throw them away!  She took 10! 

how to decorate your mantel


The old platter was my grandma’s….my mom gave it to me.

how to decorate your mantel


I got the little wooden box and milk bottle from a tag sale…I think I paid  a buck a piece for them.   I got the old blue ball jar from my mom…it’s filled with vintage buttons.  Oh how I love old buttons!

how to decorate your mantel


how to decorate your mantel


how to decorate your mantel

I just love my fall mantle!

How to decorate your mantle

How are you decorating for fall?

I’m linking up with Layla’s Mantle linky party over at The Lettered Cottage!

Missy

Friday, September 16, 2011

Best Banana Bread Recipe

I figured while you waited for me to work on my chairs,  I’d at least give you a great recipe for a snack!  :0)
Banana Bread
This is a really good recipe for a nice, moist banana Bread…
Ingredients:

2 cups all-purpose flour
½  tsp. baking soda
½ cup white sugar
½ cup brown sugar
1 egg
5 tablespoons milk
1 tsp. baking powder
½ tsp. salt
1 tsp. vanilla
1 ½ tsp. cinnamon
½ tsp. nutmeg
½  cup margarine
1 cup mashed bananas
½ cup chopped walnuts (optional, but why would you leave them out! yummy!)

Directions
1.Sift together flour, baking soda, baking powder, salt, cinnamon and nutmeg.
2. In a large bowl, cream sugar and butter or margarine. Beat the egg slightly, and mix into the creamed mixture with the bananas and vanilla. Mix in sifted ingredients until just combined. Stir in milk and nuts. Spread batter into one greased and floured 9x5 inch loaf pan.
3. Bake at 350 degrees F (175 degrees C) until top is brown and cracks along the top.
Enjoy!

Hugs
Missy

Sunday, September 11, 2011

New Kitchen Chairs…

I have been wanting new kitchen chairs for a LONG time, but couldn’t find what I was looking for that didn’t cost a blooming fortune! 
I have lived with these for over 20 years and think it’s time for a change…
oak table and chairs

You see, I want something that looks like these…minus the burlap, it doesn’t quite fit in my décor, but I LOVE the shape of these chairs!
louis chairs

My hubby knew what I wanted, and for Christmas (yes LAST Christmas) he bought me four of these. (they’ve been in our garage since last year waiting on me!!)
target dining chair

We found them at Target and got two for $139.00 with free shipping.  The only problem is they don’t go with our house, so I decided to re-do them.  Yes…I know, they’re new.  I’ve gotten so much flack from people telling me I shouldn’t reupholster NEW chairs!  Well why not I say?!  It’s the shape of the chair I was going after, not the fabric! lol 
So stay tuned to my next post to see what I dared to do to these babies!
Have you ever done anything quite as crazy as “messing” with a new piece of furniture to make it into what you want it to be? Please let me know I’m not crazy!!
(Sorry I haven’t posted in a little bit, but I’ve been crazy busy around here trying to teach school to my little guy, help my hubby with getting stuff ready for leading music at church, (he’s the worship leader) and getting ready to have 30 people over for a cookout!  Yes, I said 30!  We’re having a cookout this coming weekend for all of the band, choir and audio people at our church.  I’ll be honest…I’m a little freaked out with everything that still needs to be done before Saturday…ya’ll know how many projects I get going at once….and lets just say I have a lot of clean up to do before they all come over! lol )
Surprised smile
Hope you all have a blessed week!
Hugs
Missy

Wednesday, August 31, 2011

How to Add Molding to Mirrors


Hey guys! I don’t know about you, but I HATE the big slab mirrors builders always seem to put into new homes.  We’ve been here about 4 1/2 years now and I couldn’t take it anymore! I decided I had to do something to improve the look of the mirror in my boys bathroom.
This is a picture of my boy’s bathroom BEFORE:  .……………..
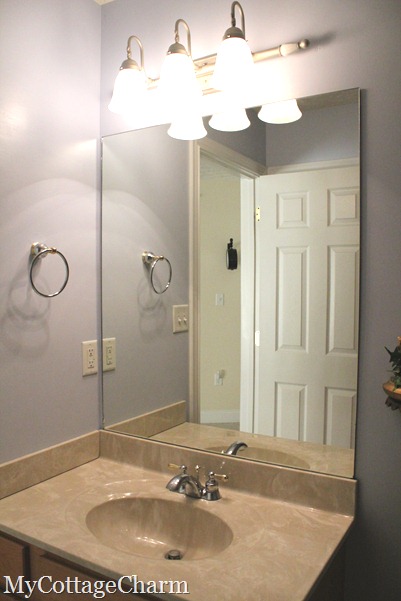
How to apply molding to mirrors
I’ve been working on giving it a little facelift and thought the mirror would be a great, quick project to help it along in it’s renovation.
I went to Lowes to find some molding. (have I mentioned that Lowes is my favorite store on planet earth?…guess I’ve said that a few times huh?!)  Well, while at my favorite store, I found this molding…….
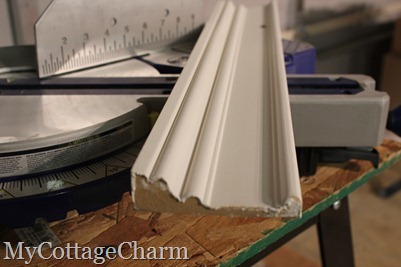

how to use  a miter saw
I believe, in the store, it was called Howe and it was $18.80 for an 8 ft long section…I had to buy two, but I sure couldn’t buy a huge framed mirror for that price, so it was still economical, but you could do this with any molding. (so you could go cheaper if you’d like)

First I measured my mirror, it was 36” wide, by 42” tall…I actually cut my wood a little bigger so you wouldn’t be able to see the mirrors edge when I installed the wood.  I decided to make it 37” x 43”…..that gave me 1/2” all the way around to hide the edge of the mirror.

I set up my handy dandy miter saw………….
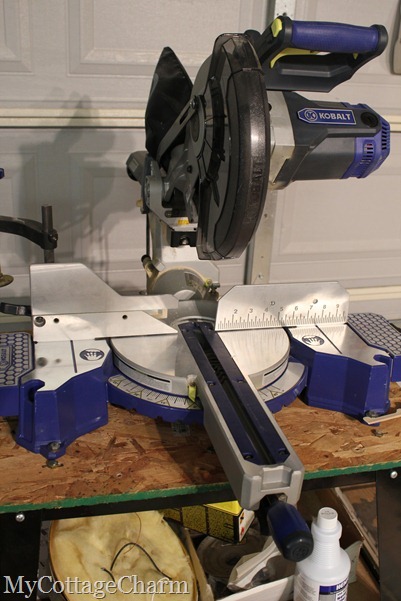
Kobalt miter saw

and put the setting to 45degrees, like this…
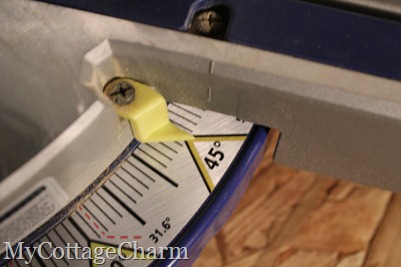
how to use a miter saw

Then, with the thickest part of the molding (that will be your outside edge) to the back of the saw, you make a 45 degree cut toward the middle, like this…….
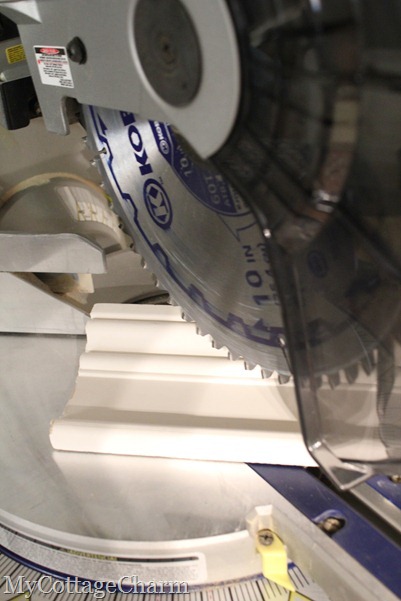
how to make a frame
Then from the point of that cut, you measure the width (or height, depending on which piece you’re working on)  and mark the back edge and make another 45 degree cut in the opposite direction.
You’ll end up with four pieces that look like this….
how to build a frame for a mirror
Pay close attention to the fact that you cut the ends at a 45 degree angle slanted in, so each piece is in the shape of a trapezoid. :0)

trapezoid
It really is that easy….just measure twice and cut once! You can always make another cut, but you can’t add the wood back on once it’s been cut off. :0) (also make sure your measurement are from point to point..that will be the measurement of your width or height of your mirror)
Ok….now this is an important thing to know…when you paint your pieces of wood, make SURE you paint the back of the edges, because they WILL reflect in the mirror and will show if they’re not painted.  My wood came pre-primed, so all I had to do was give each piece a couple of coats of paint………including the backs!
To install the wood, use this……….
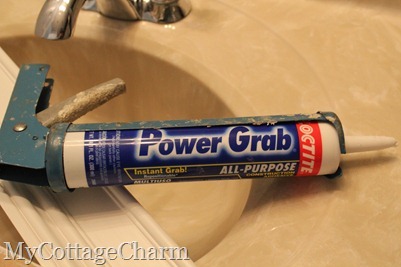
loctite power grab
If you’ve never used a caulk gun before, I’m including a vlog of myself at the end of this post that shows you exactly how to use the gun…I promise it’s not hard. :0)  (oh, and don’t make fun of my accent……I can’t help that I’m a southern girl!…and for some reason my lips look funny…ignore the lighting and just try to learn something! )  lol :0)
Apply the Loctite Power Grab to the back pieces of your wood like this….
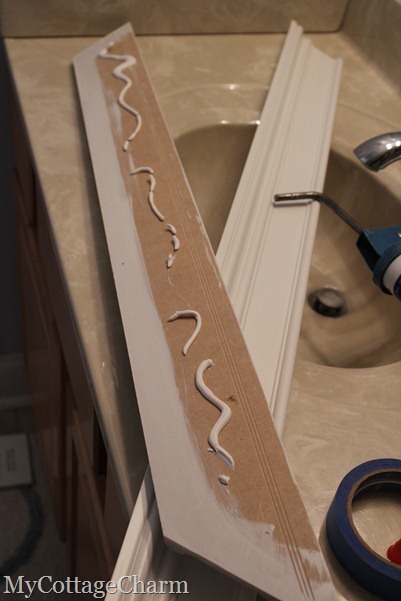
how to frame a mirror
A squiggly line works better than a straight line, but make sure not to get too close to either edge so it doesn’t ooze out the edges when you install it on the mirror.
I started by installing the bottom piece of wood first, then added each side piece…and finally the top.  I made sure the cuts were lining up and everything was straight…
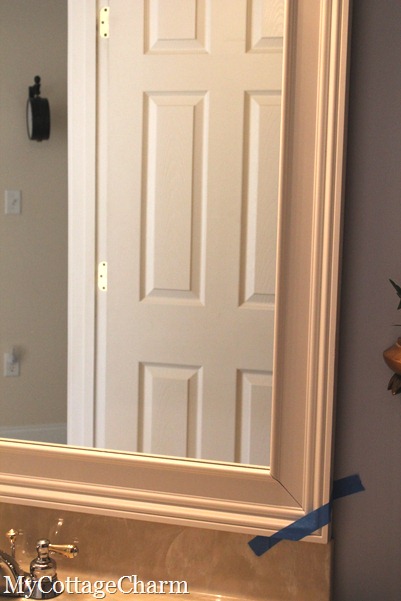
how to frame out a mirror

Then I used some painters tape to hold it in place while it dried….
how to make builders grade mirrors pretty
After it dried, I caulked any cracks where the mitered edges came together and just touched up the paint.

This pictures is the reflection of the back of the piece of the molding in the mirror….this is why I said you need to paint the back edges of the molding.  They REFLECT! :0)
IMG_1603

Here’s the finished mirror!  I still have to put in all the new things I bought, but you can at least see the after pic of the mirror.
how to frame a slab mirror
MUCH better, don’t ya think?!
I’m going to be doing something with that vanity soon….I’m not sure whether to paint it,  just buy new knobs or what.  Any suggestions or ideas?
Okay..here’s my VLOG if you’d like to learn how to use a caulking gun.

How to use a caulking gun
Blessings
Missy

Monday, August 29, 2011

A Perfect Day


On Friday my little man and I went to Evan’s Orchard after we finished homeschool.  I have purposely scheduled our Friday’s on the light side, so we can spend some time doing some fun things together.   Here was our day in pictures…..
What a beautiful, picture perfect day this turned out to be!…
GORGEOUS!

We started out with a fresh, homemade apple pie and an Ale81! (for those of you that don’t know…Ale 8 is a ginger based soft drink made only in KY…and for years could only be purchased in KY…I think two other states sell it now) :0) 
apple pie

OH MY was this yummy!
homemade deep fried apple pie

It didn’t last long!!…
deep fried apple pie

Farmer Brown.. :0)
farmer brown


These were the friendliest baby goats! They would come right up to the fence and let you rub their cute little heads…I could have given this one a smooch he was so cute!!
goat

Our orchard has lots of fun stuff to play on in the playground area….it’s $5.00 to play as long as your heart desires.   With perfect blue skies, low 80’s and no humidity, we stayed a LONG time! :0)
John Deere

I told my little guy I wanted to try out the sports mode on my new camera and asked him to jump….we cracked up when we saw this picture because it looks like he’s levitating in the air! LOL
levitation

I told him to try one more time….this one is much better! (he even smiled!) lol
jump!

jumping fun

This was a new addition to the orchard this year….a whole bin full of corn!  This looks like it would be fun for little kids to play in.
corny fun


This is where Carson spent much of his time! This tube was hanging from ropes and I would swing him back and forth while he tried to crawl around inside the tube.  It was nice and cool in there too!
Adorable!

See, here’s the outside of the tube hanging from the ropes..he crawled all over it, inside and out!
fun times


These things are called Rat Races….he loved going up and down the course in them.  He couldn’t really race anyone because we were the ONLY people there! We had the whole play area to ourselves….talk about the perfect day!
rollin rollin rollin


We also got to pet the bunnies….some very friendly animals at the orchard!
bunniesbig bunnies

Well that was our day!  How did you spend your weekend?
Hope it was fun!
Hugs
Missy
Technorati Tags: ,

Tuesday, August 23, 2011

Signs of the Times…

If you follow me on Facebook or Twitter, you’ve already heard this story, but I had to share it on here…I thought it was so funny and cute! (you can follow me on FB and Twitter on my sidebar if you’d like)
For those of you that are newer around here, you probably don’t know I homeschool my 10 year old son Carson, we call him C-note. (ain’t he a cutie pie!) :0)
C-note
We started school this week and I asked him to write his spelling words in the dreaded cursive!  (such a bad mom, I know! lol) As he was sitting in his dad’s recliner working, he got about third of the way down the page and exclaimed, “oh no, I’m writing them in the wrong font”! 
I got really tickled, so he was embarrassed, but it was so doggone cute!  When I was 10, I didn’t even know what a font was….my how the times have changed!

Do you have any funny stories about things your kids have said?..I’d love to hear them! (it would probably make him feel better too!) :0)
Hugs
Missy

Wednesday, August 17, 2011

How to Make Cabinet Feet


Have you ever priced cabinet feet?  Let me just tell you they’re expensive…anywhere from $20 upwards to $60 PER foot! Crazy I tell ya!  I’ve been wanting to put feet on my kitchen cabinets for a long time, but I’m sure not paying those prices!  Then I came across a fabulous tutorial that’s floating around in blogland on how to make your own cabinet feet. I was totally inspired by it, so I made my own.  Heather, over at The Picket Fence, came up with this idea, and it’s great!
To make your cabinets have feet like this…..


How to make cabinet feet

you just need to buy a few packages of these from Lowes….


craft finials

These are made for curtain rods or crafts and you get two in a pack for $2.86!!  (if you want cheap curtain rods, these on closet doweling would be great!_
what to do with finials

You’re going to want to remove the screw with pliers like this…


finials

To get mine to fit under the cabinets, I cut off the round top of the finial to make it flat, like this……


finials

You’re also going to want to purchase some 1” flat head plugs. They’re $2.55 a pack.


cabinet feet

I used my Gorilla glue that I got on my Bloggers Jaunt back in June to glue the plugs in place…


gorilla glue

Just place a little dab of blue on the end of the finial that you took the screw out of like this….. (sorry about the blurry picture)


gorilla glue

Just place the plug on your dab of glue and let dry….


how to make cabinet feet

Then you just prime and paint, or stain them, the color you need. I just glued mine in place with gorilla glue, but you could just hot glue them in place too, they just wouldn’t be as permanent.
Here’s the before and after pics of my cabinets….

BEFORE:

how to make cabinet feet
AFTER:

cabinet feet

BEFORE:
how to make feet for your cabinets

AFTER: (and please over look the dirt on my floors, I guess I really should sweep before doing after pictures! lol)  :0)

how to make feet for your cabinets
Here’s the price break down…

I bought :  4 packs of finials at $2.86 a pack  $11.44
                       2 packs of plugs at $2.55 a pack        5.10
                                                                                          -----------
                                                             for a total of     $16.54!!

I did all my cabinets for less than the cost of one foot! woo to the hoo!

Hope you enjoyed the tutorial and let me know if you do this to your cabinets!
Missy     

Related Posts Plugin for WordPress, Blogger...