Showing posts with label Recipes and kitchen tips. Show all posts

Monday, February 3, 2014

Peach Dumplings!! Oh MY!


A friend of mine from church brought these amazing little bundles of awesomeness to our Christmas Music Party and OH. MY. GOODNESS do these things taste awesome! My hubby didn’t get any of these the night of the party, so I got the recipe from her and made them for dessert the other night. He said, and I quote, “This is, hands down, the BEST dessert I have EVER had”! My hubby has eaten a lot of desserts in his life…I know, cause I’ve made most of them for him, so he knows a good dessert! We ate them with ice cream, and they are SO easy!

peach dumplings


Here’s the recipe! (by the way, I halved this recipe cause we didn’t need 16 dumplings for our family)

2 cans of peaches in light syrup
2 cans of crescent rolls
2 sticks of butter
1 1/2 cups of sugar
1 tsp vanilla
Cinnamon to taste
1 1/2 cups orange juice

Drain both cans of peaches in a colander and then dry the 16 largest peach slices completely with paper towels. 
Unroll your crescent rolls into 16 triangles, and roll a slice of peach in each crescent roll and place in a 9 x 13 pan.
Melt butter, then add sugar and barely stir. Add vanilla, stir, and pour entire mixture over peaches. Pour orange juice around the edges of the pan. Sprinkle with cinnamon and bake at 350 degrees for 40 minutes.
Serve with ice cream, and spoon some of the sweet sauces from the pan over the top.

TRUST ME…YOU MUST MAKE THESE! :0)  The tops get crunchy and sweet, and the middles are soft and warm….then you have all that orangey syrupy goodness in the glaze.  WOW!  Best with vanilla ice cream.

Smile
Let me know what you think!
Blessings
Missy

Wednesday, January 29, 2014

Operation Organization!

Hi all!  I am FINALLY all better from my epic illness! I have never been that sick in my whole life, and I never want to repeat it either!
After I got my energy back, I decided to have a Operation Organization for the month of January! I filled the entire front page (double columns) of things to organize in our home in the month of January, and I’m pleased to say I only have one room left to go! Except for the one room that’s left, every drawer, cabinet, piece of furniture, closet, under bed……….well, lets just say every nook and cranny of our house has been gone through, purged and organized! I’m feeling quite accomplished! :0)

Today I thought I’d show you one area of our house that has bugged me since we moved in…………under the kitchen sink! I was too embarrassed to show you the before pic of what it looked like, so here it is all empty! :0)

Before shot of sink

You can see in the picture above, that there’s swelling from where there was a water leak before we bought our house, and stains from various things that had been stored down there.   I decided it was time to cover it up! I had some leftover peel and stick tiles from my laundry room makeover that I though would be perfect for this job. 
First I scrubbed the floor of the cabinet with hot soapy water, rinsed and let it dry thoroughly.  Then I started laying out whole tiles from the front to the back.  I measured where I needed to make the cuts…………….

how to organize your sink

and transferred the measurements to the back of the tiles like this…..(see the marks?)

cutting peel and stick

Then all I did was make three or four passes with my utility knife against the edge of my level that was on the marks, then just snapped the piece of tile off.  It really is that simple.

how to cut peel and stick tile

Then I just peeled and stuck it all down in place…….doesn’t that look better?!!!  It only took 6 tiles and you can buy them individually at Lowes, so the whole thing would be about 6 bucks! That’s a lot of improvement for 6 dollars! :0)

organizing under your kitchen sink

I’m still going to get a caddy to put my cleaners in when I get to Walmart, but it’s still better than it was.  I don’t use a lot or harsh cleaners anyway, mostly vinegar, baking soda and peroxide. I use ammonia occasionally. but I’d rather go as non-toxic as possible whenever possible.

kitchen sink

Am I the only one that goes completely organizing crazy in January? We really want to tackle our garage, but our temps have been CRAZY cold around here…I’m talking –27 degree wind chill…brrrr, so the garage will have to wait until Spring!

What have you been organizing?

Oh…and thank you to everyone for your sweet comments and get wells, I really appreciate it. I love you guys!

Blessing

Missy

Saturday, October 5, 2013

Behind the Scenes of My This Old House Magazine Cover Photo Shoot…Everything You’d Want to Know!


This Old House

Hey you guys! I’m still reeling from all the excitement of being on the cover of This Old House Magazine…it’s been such a fun experience!
I thought I would spill my guts and tell you everything I could think of that you might like to know about the shoot. :0)

The first question I had when my friends found out about the photo shoot was “how did it happen?”  They figured I submitted pictures or something to the magazine, but I didn’t, they found me. I had pinned pics of my window seat build to Pinterest, and Megan (sweetest girl!) found it on there and followed it back to my blog, and emailed me.  First they asked me if I would be willing to do a photo shoot and allow them to use my window seat in their magazine. ……WELL DUH! lol  :0)  Megan (writer for the piece in the magazine) said she wanted to use it in a small article, and I was fine with that.  THEN she called and said it would be a main featured article…and I was fine with that too! Then about a week and half before the magazine hit the stand I found out it was going to be on the cover, and that my friends, was a fun day! I don’t think my feet touched the floor the rest of the day! :0)

Lets go back for a minute to the photo shoot, I want to tell you about the day. It happened on July 30th…yes, a long time for this girl to keep her mouth shut! I had to sign a contract that I wouldn’t spill the beans until the magazine came out…and I have a big mouth!  SO HARD!  I found out right before the photo shoot that Brian Carter, a stylist from Atlanta, would be coming up to style everything…super nice guy! The photographer was coming down from Chicago, his name is Nathan Kirkman, and his assistant was Brett.  They were THE nicest guys!  Brian came by the night before and dropped off many bags of goodies by our house, so you KNOW I had to be nosey and look at the pillows.  I took a lot of photos, but I’m making sure to only post pictures here of things he definitely used in the photo shoot, just in case they want to use the other stuff later.

target

TJ Maxx

Homegoods

target

how to build a window seat

photo shoot

what happens in a photo shoot

Yes, our house was FULL of goodies!  Since the cover was to be for the October issue, they wanted fall colors…so they brought pillows with all the autumnal colors in them.   After they left, I went pillow shopping too…but that’s another post! :0)

Here’s the lovely flowers from the shoot, Brian left them with me after he left, I enjoyed them for at least a week or two!

how to arrange fall flowers

I cannot tell you how much fun the photo shoot day was….but it was LONG!  Here’s the set up!  They arrived at 8:30 in the morning, and Brian the stylist (the guy in the glasses) set everything up for the magazine shot, then Nathan (guy on the computer)  set up all his equipment.

how to build a window seat

I learned so much about my own camera that day! Nathan was working with a Canon camera and he had it tethered to his computer….I did NOT know my canon camera could do that! See the pic above…he’s taking pics from his computer, his camera is closer to me and to the left.

how to use a canon t2i camera

I have been playing with taking tethered pictures since they left! I love learning new things!

Anyway, Nathan would take a picture, they would decide if they liked it, then they would email it to New York where five people were waiting to give their opinions.  They would say things like, “move the table closer to the camera”, or we don’t like that piece of pottery there, could you move it over 6 inches to the left”.  They did this over and over! It was SO fun to watch and see how it was all done!  I asked Nathan if it stressed him out changing things and then waiting….he struck this pose. His fake stressed look…how funny! :)

photo shoot fun

OH..there is one story I have to tell you!  On the front cover photo there is a tray with a red cup on it….well it started out as a white ironstone mug, but they decided they wanted some color so they asked for a red mug. I don’t own a red mug, so Brian had to run out and buy one. Well he went to several places and ended up buying an entire set of red dishes from Kmart.  Long story short…they ended up taking two of every picture we did…….one with the white mug, and one with the red mug.  After we were all finished, he took the set of dishes back to Kmart, THEN New York called and wanted to re-do a shot, so he had to go back to Kmart and buy the set of dishes again! He told me when everything was over he wasn’t returning those dishes again, he would just take them back to Atlanta and return them there! :0) As you can see, they ended up with the red cup on the cover, but what I didn’t notice until a few days after reading my magazine, was that they used the white mug on the 2 page spread! How funny!

In between all the waiting for New York to call back and see how they liked everything, we did this…………..

What to fix for a luncheon

Yep, we did some serious munching! I bought a meat and cheese  tray, croissants, had fruit and dip and frosted brownies! I also brought out my homemade pickles….they liked those a lot! They said hardly anyone ever feeds them on photo shoots…I thought that was kinda sad!  Hopefully they enjoyed the little spread…I know I did, I was starving! :)

So after OVER EIGHT HOURS of shooting pictures (and watching my neighbors drive by our house REALLY slowly trying to figure out what all the lights and camera equipment was for)…………

This Old House photo shoot

We ended up with this……. A magazine cover, a wonderfully fun day, and a shot of me in Joseph Beth bookstore by my first ever published piece in a magazine. 

IMG_5009
(this pic taken by my very sweet hubby….wish he had told me to move my hair back, what a mess! lol)

I’d say it was a really good day. :0)
Blessings,
Missy

PS…I PROMISE I’ll show you the twist to my garden shed in my next post….I just couldn’t hold this in any longer, I mean it’s only been a secret since JULY!!

Tuesday, September 3, 2013

Garden Roasted Tomato Soup

what can I do with garden tomatoes

Hey guys!  If you all are like me, you have loads of extra ripe tomatoes coming from your end of summer gardens.  I wanted to show you a recipe I made with all my tomatoes! 

Garden Roasted Tomato Soup

About 3 lbs of peeled garden tomatoes (cut into chunks)
2 onions cut into chunks
3 cloves of garlic, minced
salt & pepper
1 1/2 tablespoons finely chopped fresh rosemary or 1 1/4 teaspoons dried
1 1/2 tablespoons finely chopped fresh thyme or 1 1/4 teaspoons dried
1/4 teaspoon dried crushed red pepper
6 cups chicken broth
6 tablespoons chopped fresh basil

Preheat oven to 400 degrees Put the tomatoes, onions and garlic  on cookie sheets, sprinkle with salt and pepper.

what can I make with tomatoes

roasted tomato soup

Drizzle both sheets of tomatoes etc. with Olive Oil

extra virgin olive oil

Roast for 40 minutes, or until the onions and tomatoes are nice and tender. (mine actually took closer to an hour, but I think it depends on your oven, so just keep an eye on it)

how to roast tomatoes

After the tomatoes are done, transfer tomatoes and any accumulated juices to processor, pulse until the tomatoes are still a wee bit chunky. Heat 3 tablespoons oil in large pot over medium-high heat,  stir in tomatoes, rosemary, thyme and dried crushed red pepper. Add chicken stock; bring to boil. Reduce heat and simmer uncovered until soup thickens slightly, about 25 minutes. Stir in fresh basil, remove from heat, and eat!

Here’s the end results! Oh yummy!  I topped our tomato soup with some Italian croutons and a little grated parmesan cheese!

homemade tomato soup

Enjoy!

Missy

Friday, August 16, 2013

How to Make Pickles

how do you make pickles

I remember when I was growing up I would watch my mom and my grandma in the kitchen canning all the wonderful things they had grown in their gardens.  One year my mom and dad let me have my own garden….I raised all kinds of things! Mom told me my garden actually did better than theirs that year! :0) The one specific thing I remember about my garden that year was raising spaghetti squash, I thought that was the coolest stuff ever! I raise a garden of my own now that I’m an adult….it’s not HUGE like the ones they used to raise, just a couple of raised beds, but it yields quite a bit! This year I had an abundance of cucumbers, so I made the same pickles my grandma used to make….heck, she still makes them! She still has a garden too, and she’s in her 80’s!!
They’re called….

MILLION DOLLAR PICKLES

  • 10 cucumbers, sliced

  • 4 cups sliced onions (I use sweet)

  • 1/3 cup pickling spice (you can get it at Walmart…I found mine in the aisle with the canning jars)

  • 4 cups water

  • 2 teaspoons ground turmeric (be careful this stuff stains everything!)

  • 1 teaspoon celery seed

  • 6 cups white sugar

  • 2 quarts white vinegar

Directions
  1. Place the cucumber, onions, and pickling spice in a large bowl.

    homesteading
  2. Add the water and allow the mixture to stand 6 to
    8 hours or overnight in the fridge.

    how to can pickles
  3. Drain liquid from mixture.  In a large saucepan, mix the cucumber mixture, turmeric, celery seed and white sugar. Pour in the vinegar, adjusting the amount so that it covers the mixture. Bring to a boil.
  4. While the above mixture comes to a boil. I use that time to sterilize my jars. (I’ve already run them through a dishwasher cycle to make sure they’re clean) I just pretty much dunk them in the water and make sure the boiling water gets on all sides and then put them on a towel to drain.

    cucumber recipeshow do you make pickles

  5. After all the jars are sterilized I put all the jar lids and rings in the water to sterilize them.  I don’t get them out until the very end. (I always make sure the rubber part on the flats are up. so they don’t melt with the heat.)
  6. After the cucumber mixture has come to a boil, transfer the cucumbers and onions to the sterile jars.  Ladle in enough of the boiling liquid to just cover the pickles in the jars…pretty much about 1” from the top of the jar.  While the mixture is still hot, wipe off the top of jar really well with a damp towel, then with a dry.  You want it to be clean and dry or it won’t seal.  Take one of the flat lids out of the boiling water, dry it off, and immediately put it on top of the clean jar, screw on the ring part of the lid.  (I fill one jar at a time)
  7. Repeat for all the jars.  The above recipe makes 6 pint jars of pickles
  8. Put your pickles on a towel to cool. As they cool, you’ll hear the lids popping, which means they’ve sealed.  If you have one that doesn’t seal, just go ahead and stick it in the fridge to eat, it’ll last quite a while.

how to make pickles

One thing you need to know, and this is important!  The turmeric  stains everything! Put down towels on your counter where you’re working and expect them to have yellow rings when you’re through. Also wipe up anything that might splash on your stove, etc because I’m telling you this stuff does not come off…IT STAINS BIG TIME!  I now have very yellow dishtowels and a yellow ladle,  but the pickles will be worth it when I make pulled pork BBQ this winter! YUMMO!

These make great gifts too!

Blessings
Missy

Monday, December 12, 2011

Christmas Gift Idea….Delicious and Fun!

I told you all about our wonderful Choir Christmas party we had last weekend, and wanted to share the treats I made for each choir and band member.  I found this idea from Pinterest and thought it was a fantastic idea for a gift for a lot of people.
By the way, if you aren’t on Pinterest, if you’ll leave me your email address, I can send you an invitation…if you click HERE, you can follow my boards too!


First I went on Ebay and found two buckets of these Wilton Cookie Cutters…they ended up being less than $20, which is pretty doggone good for 36 gifts!

Wilton cookie cutters
Then my mom helped me out by baking me her FAMOUS Coca Cola cake in a shallow pan. (hers is better than Cracker Barrels any day of the week!!) This recipe works great because the icing is like fudge and accepts the cookie cutters without getting smashed. This reminds me…. I need to get her recipe!!  (you could also do this with fudge!)

I took each cookie cutter and arranged them on top of the pan of cake first, so I could maximize the amount of cookie cutters I could get on top of the cake.
inexpensive christmas gifts for a crowd
Then I gently pushed them down  into the cake.  I went ahead and did them all at once, so I wouldn’t mess up any of the cake, taking them out one at a time. 
coca cola cake
I used a little icing spatula to remove each of the cookie cutters. Guess who got to eat the little pieces that were left?!  Oh yeah baby, we all munched on that!  (this picture is making my mouth water….that icing tastes exactly like rich, creamy fudge!)
christmas gift ideas
After I lifted the cake filled cookie cutters out of the pan, I wiped off the outside of each one so it wasn’t too smudgy….you want to make a nice presentation. :0) 
chocolate christmas
You can decorate them with candy etc, if you’d like at this point.


I bought some really cute little bags to put my goodies in….
gift ideas for a group
christmas bags

Then I put one cake filled cookie cutter in each bag and had an assembly line going with Carson…I bagged, he twist tied.  :0)
christmas gift ideas

We actually took it a step farther and made hand made gift tags and put them on with red pipe cleaners, but I forgot to take a pic of that part and I had already given them all away when I remembered.  Sorry…bad blogger!  lol
christmas gift ideas
I
thought this was a wonderful idea for giving gifts in large numbers.  You could give them out to your neighbors, church choir, friends or whatever. 
Have a Merry Christmas…it’s getting closer!!  (Carson lets me know this each day!)  lol
Missy

Friday, September 16, 2011

Best Banana Bread Recipe

I figured while you waited for me to work on my chairs,  I’d at least give you a great recipe for a snack!  :0)
Banana Bread
This is a really good recipe for a nice, moist banana Bread…
Ingredients:

2 cups all-purpose flour
½  tsp. baking soda
½ cup white sugar
½ cup brown sugar
1 egg
5 tablespoons milk
1 tsp. baking powder
½ tsp. salt
1 tsp. vanilla
1 ½ tsp. cinnamon
½ tsp. nutmeg
½  cup margarine
1 cup mashed bananas
½ cup chopped walnuts (optional, but why would you leave them out! yummy!)

Directions
1.Sift together flour, baking soda, baking powder, salt, cinnamon and nutmeg.
2. In a large bowl, cream sugar and butter or margarine. Beat the egg slightly, and mix into the creamed mixture with the bananas and vanilla. Mix in sifted ingredients until just combined. Stir in milk and nuts. Spread batter into one greased and floured 9x5 inch loaf pan.
3. Bake at 350 degrees F (175 degrees C) until top is brown and cracks along the top.
Enjoy!

Hugs
Missy

Friday, July 1, 2011

4th of July Dessert!


We interrupt the showing of the laundry room and laundry room giveaway, to share a 4th of July recipe! 
trifle dessert
I figured I’d better hurry since the 4th is quickly approaching!
You remember the Mint Julep June Jaunt I participated in a couple of weeks ago?  Well while having a fab time with all my bloggy friends, I found that fantastic trifle dish at the Goodwill we went to for $5 bucks!  I brought her home and bleached it good and decided to use it for this dessert!
4th of July Red, White and Blue Berry Trifle!
You’ll need one 10 oz Angel food cake…cubed.
3 cups of cold milk
2 small boxes of instant vanilla pudding
1 quart of strawberries
1 pint of blueberries
1 8 oz container of Cool Whip.
                                                                                                                                                                                                                                                                              I mixed the 3 cups of milk in a bowl with the 2 boxes of pudding and whisked for a couple of minutes.  Let it stand to thicken just a bit and then fold in the cool whip.

In the bottom of your trifle dish…or any clear dish, put down a third of your cubed angel food cake, top with a third of your pudding mixture and then a third of each fruit.  Repeat two more times. 
I topped mine off with another dollop of the pudding mix and some berries. 
SO easy and pretty to boot!
See all those pretty layers?! 

4th of July dessert
YUMMO!!
Hope you enjoy!
Don’t forget to sign up for the laundry room damask knob giveaway! It’s open till July 6th, so hurry!

Missy

Wednesday, April 13, 2011

How to Have a Mario Party! Treasures and Trinkets Linky Party!


Welcome to Treasures and Trinkets Linky Party! Link up something you love, then link back to me.  Yep, it’s that easy!

You’re invited! (to see what we did for our Mario party!) I promise this is the last Mario party post! lol
These are the invitations we used for my son’s 10th birthday party!  We got them from Amazon for $3.59 for 8.


Mario invitation

I decided I wanted to make the little brick boxes the coins pop up out of on all the Mario games.  I found a printable cut-out HERE, and enlarged it a little on my computer.


DSCN4847

All you do is put a little glue on all tabs, except the lid and you end up with this….


DSCN4849


I put a few chocolate coins in each box…it was a HUGE hit!


DSCN4851


I think it turned out really cute!


DSCN4850


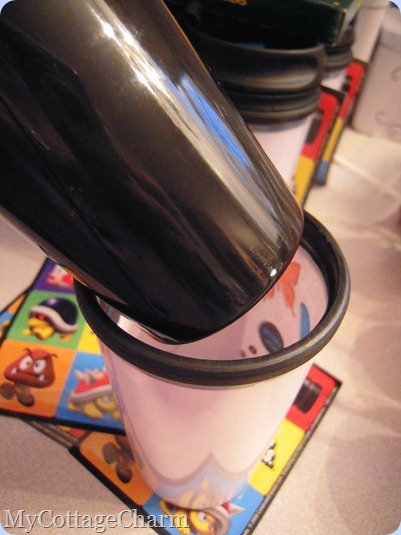
I knew my son wanted to do a craft at his party, so I went to the Dollar Tree and picked up these cups for a buck each.


cup craft

The top unscrews like this……..


cup craft

Then you can decorate the paper insert …..
cup craft insert paper

We used these…..


Mario Stickers

so the cups would look like this………

Mario craft

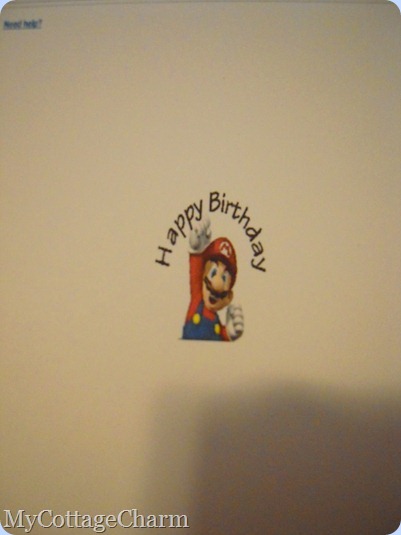
I also found an image of Mario and wrote Happy Birthday…

DSCN4562

then, I printed them and cut them out and used them as candy bar wrappers…perfect for the little snack sized Hershey bars!…


Hershey Mario Candy wrapper

I ordered these favor boxes from the same people on Amazon that had the invitations. $2.99 for four, so I bought two packs.


favor boxes


Here’s the loot we put in them! Most of it’s from the Dollar Tree!


          favor boxes loot!


Remember these? If you’re new to my blog, you can find the tutorial to make these HERE.


Mario and Luigi birthday party

I even found this Mario candy at the Dollar Tree…who knew!


mario candy from Dollar Tree


I used some low pile, fake fur to cut out mustaches and then sprayed the back with repositionable adhesive like this…..

mario mustaches

I sprayed it on some wax paper so they wouldn’t stick…


DSCN4924

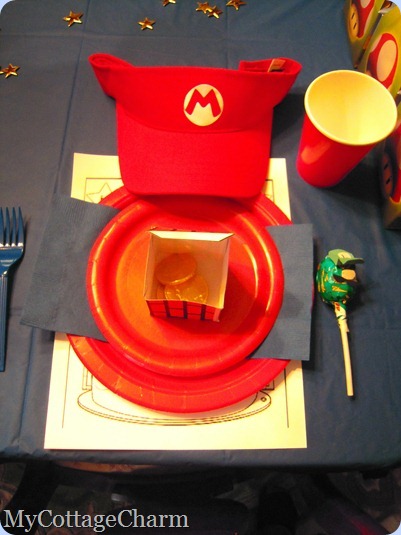
Here is our table setting…please excuse the pictures, the lighting was really funky that day for some reason.  I used a blue table cloth from the Dollar Tree and red plates and cups, which I layered with blue napkins and also blue cutlery. I had there little coin boxes and hats at each place setting too.  I bought some little scatter stars on clearance at Party City for .50 and sprinkled them around.


Mario party table

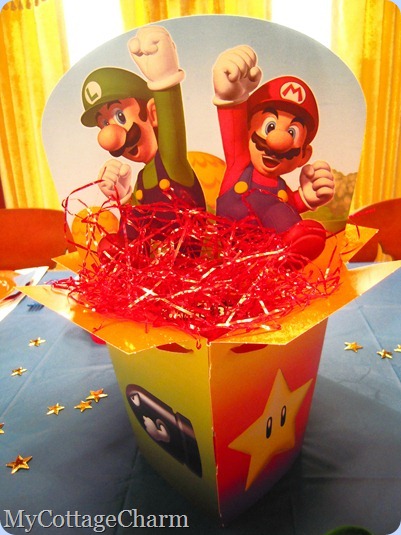
Our centerpiece came from Amazon as well..same people as the other stuff above.  They had some really cute stuff!

centerpiece

I used a printable from the web as a “placemat”.  It’s of Mario and Luigi….I just googled Mario print out and found it.  If you’d like my tutorial on how to make the hat, go HERE.

          place setting for Mario party

For a little extra added fun, I drew Mario and Luigi and had my little man color them, I think they turned out sweet and now he has them in his room.  I just hung them up on the blinds in our dining room.


Mario drawing
Luigi drawing

Here are the VERY well behaved group of boys that came to my son’s party!  They just found their Mario and Luigi lollipops…just look at those smiles!
Mario birthday party

We fed the boys pizza……….


and Mario mushroom cupcakes! For the tutorial on this go HERE.
mario mushroom cupcakes

My little man received SO many cool presents, but I think his favorites were the stuffed Mario, Luigi and Yoshi that his dad and I found him. (also on Amazon! lol)  Can you tell he likes them…look at that face!
DSCN4969

Last picture, I promise!  This is the group with their hats, mustaches and silly faces, they really had a ball and I had so much fun putting all this together for my guy~!
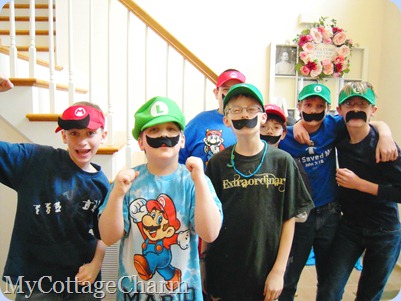
mario gang

SO!~ what have you been up to?  Link up something, I’d love to see what you’ve been doing. 
By the way, I have to apologize for not posting as much as normal, I’ve just been SUPER busy.  I’ll be doing some posts soon on a project I’m working on…it’s HUGE and you’re gonna love it!~ Well, at least I’m loving it and it’s not even done! Can’t wait to share!
Hugs
Missy
Related Posts Plugin for WordPress, Blogger...