The day has finally arrived!
The built-ins are done and ready to reveal!!!
I know, it has taken me forever to get to this point,
but this has been some serious work! So expect
a long post!
:0)
For those of you that are new to my blog,
I've been working on building built-ins for my son's room.
(Yes, I know that's a lot, but don't worry,
you don't have to go through all those posts....I'm going to
do a quick review of everything!)
It has taken FOREVER, but it looks so darn cute!
You can't see me, but I'm doing a happy dance!
No scrolling down to the bottom to sneak peek!
You gotta read all this stuff I did, this was a lotta work!
:)
Ok, this is where we started
A very plain jane room!
When we bought our house it was bank owned
and it was a HUGE MESS when we took possession. It's taken
us a while to get to some rooms..and this was one of them.
Until now!
My inspiration was Sarah's built-ins
She's good at inspiring me to get up and work!
Thanks Sarah!
I started this project by finding these two 30" x 30" x 12"
upper kitchen cabinets at Habitat For Humanity for $20 bucks.
They were in hideous condition, with no top or backs, but
I knew they could be fixed with a little wood and nails!
(I try to convince myself I can do anything, then get home and
think, "what did I just buy"! Luckily, I did fix these!)
:)
First, I scrubbed them down with TSP (trisodium phosphate).
This stuff will take off all dirt, grease and shine and make your project nice and clean!
BUT WEAR RUBBER GLOVES!
After all that scrubbing it was time to start building!
First I had to build a base for the cabinets to sit on so they
wouldn't look like upper kitchen cabinets sitting on a floor.
:)
I took 2 x 4's and built a rectangle like this to use as
the toe kick.
Then I cut two pieces of MDF the exact same size as the top
and bottom of the cabinet.
I put one of those pieces on top of the 2 x 4 base and kept it
flush in the back and evenly spaced all around the sides.
It looked like this when I got it attached with screws.
(you can screw it down through the top, cause you can't really
see it once it's finished)
Next, I attached the kitchen cabinet to the base using screws.
I did turn the cabinets upside down, I wanted the hardware on the top, not the bottom, like it would be in a kitchen.)
Then I attached the other piece of MDF,
that I had previously cut, to the top.
Like this...
I added the top piece so I would have a nice flat surface
to attach the bookshelf onto. You know how cabinets have that little empty space on top, well
I needed that divet to go away, so I put the flat piece on top.
Then I took MDF (medium density fiberboard)
that was 12" wide x 8 ' feet long and started
building the top book cases.
I went ahead and set the cabinet in his room and measured the
distance from the top of the cabinet to his ceiling.
I wanted the cabinets to go all the way to the ceiling.
I took that measurement and cut it back by about 1/4" so it
would slide in easily. I'll tell you how we deal with the extra 1/4" gap later.
(let's just say it has to do with this stuff....) :)
This is what the top part of the bookshelf looked like after I got it all built.
It really looks harder than it was. Basically I just
cut the two sides the height I wanted the total bookshelf to be, minus the thickness
of the top piece and bottom piece.
In other words, if the MDF is 1/2" thick, you would subtract 1"...
for the thickness of the bottom shelf and the top shelf combined.
The top shelf and bottom shelf are the exact same size as the top of the cabinet.
The inside shelves were cut to the length of the distance
between the two side pieces.
Once I got that all built,
I put on a back made of luan. (Very thin sheet of plywood)
I did all that times 2...cause I built two cabinets. :)
Then it was time to prime and paint.
I'll be honest, this is not my favorite part of any project, but
it makes it beautiful, so I endure!
This is the primer I used.
Love this stuff, it covers like a charm!
I had to prime it, I think it was twice..
Then I painted it with this-
Interior Latex Olympic Premium paint
in a bright white semi gloss.
(It came from Lowes...my FAVORITE store in the world!
I swear I could live in there!!)
They looked like this while I was painting..
After all that priming and painting, I installed them.
I took the baseboard off the wall so they would be flat against the wall and would have a definite built-in look.
(I installed the new sized baseboard after the built-ins got installed.)
First I put the bottom part in, then slid the top bookshelf on top of the bottom piece.
Once I got them all lined up and flat against the wall,
I screwed them into studs in the wall.
Here they are installed....
Next I started trimming them out with lattice strips and fluted molding..
remember these?..
:)
I put the fluted molding on the front edges of the sides and top of the bookshelves.
I used little rosette square blocks for the top corners.
(this is when I would have hidden any gaps at the ceiling with the molding...
but to be honest, they fit really tight to the ceiling..glad I left 1/4"!! yikes!)
I put the lattice strips on the front edges of each shelf, and anywhere I had raw edges showing.
(like where the bookshelf met the cabinet)
As you can see from the picture, I was also installing
Board and Batten at the same time.
If you'd like a tutorial on the Board and Batten, go here.
Next, I installed ticking wallpaper in the backs of the bookcases...
Like this....
Now isn't that better?! :)
Since we were doing a patriotic/military theme,
we decided to use red, white and blue.
I needed to inject the blue color somewhere on this wall, so here it is!
Next I built a shelf that connects the
left bookshelf with the right one.
Notice I lined it up with the top shelf in the bookcase.
I put it up with little l brackets on each end and in the middle,
I painted them out so you can't see them.
I trimmed the front of it out with
the lattice strips and put the fluted molding
at the ceiling to finish the look of the cubby shelf.
Next, I installed the ticking in the area above the cubby shelf,
so it would match the backs of the bookshelves.
Then I painted anything I'd missed, (like the new trim) with my
semi-gloss white paint.
Tada! It's finished!
Now the fun part starts!
Getting to decorate!
Here are some shots of the shelves and everything
I put on them.
I got these cute little red and white boxes from Ikea.
(It was my first ever trip..and boy oh boy am I HOOKED!..
too bad it's 1 1/2 hours away! Or maybe that's a good thing! lol)
Carson just HAD to have the cute little airplane!
We were at TJ Maxx and he saw it and it just
so happened it was a plane like the Red Baron...
he's a Snoopy/Peanuts nut!
So here it hangs. :)
:0)
On the long cubby shelf wall, I hung a propeller I found at
our local Peddlers Mall. I just have a couple of
things sitting here, but it's a little different now.
See the brushed nickel frame with the glass in it?
I am going to show you what I put in there in another post.
:)
I was trying to include some brushed nickel in the room through
things like the hardware on the cabinets, the frame and the little
metal container on the shelf.
Here I have a cutie patootie
gum ball machine. It did have all red, white and blue gumballs in it,
but someone in this house (and you know who you are)
keeps chewing all the gum,
so now the re-fill gumballs no longer match!
On this shelf I hung a metal wreath on the back
with stars and his favorite magazines and books.
I LOVE the old coffee can.
My hubbies mom gave it to me with
all my husbands marbles he collected as
a little boy. They're still in there for my son to play with.
I bought two of the metal star wreaths and
cut the stars off the second one to use around the room in
different ways.
Like this...
and this...
How many of you out there hate for electronics to show?
Well it drives me crazy...especially in my son's room
cause he has so much STUFF!
Check out what these built-ins hide...
Now you see it.
Now you don't..
Makes my heart go pitter patter! :)
The pictures I hung on the walls were prints that were my
honey's when he was a little boy.
They are soldiers in different eras of military uniforms.
I mounted them on red wrapping paper so it looks like a matte.
Here they are...
Don't ya just love em'?!
I do!
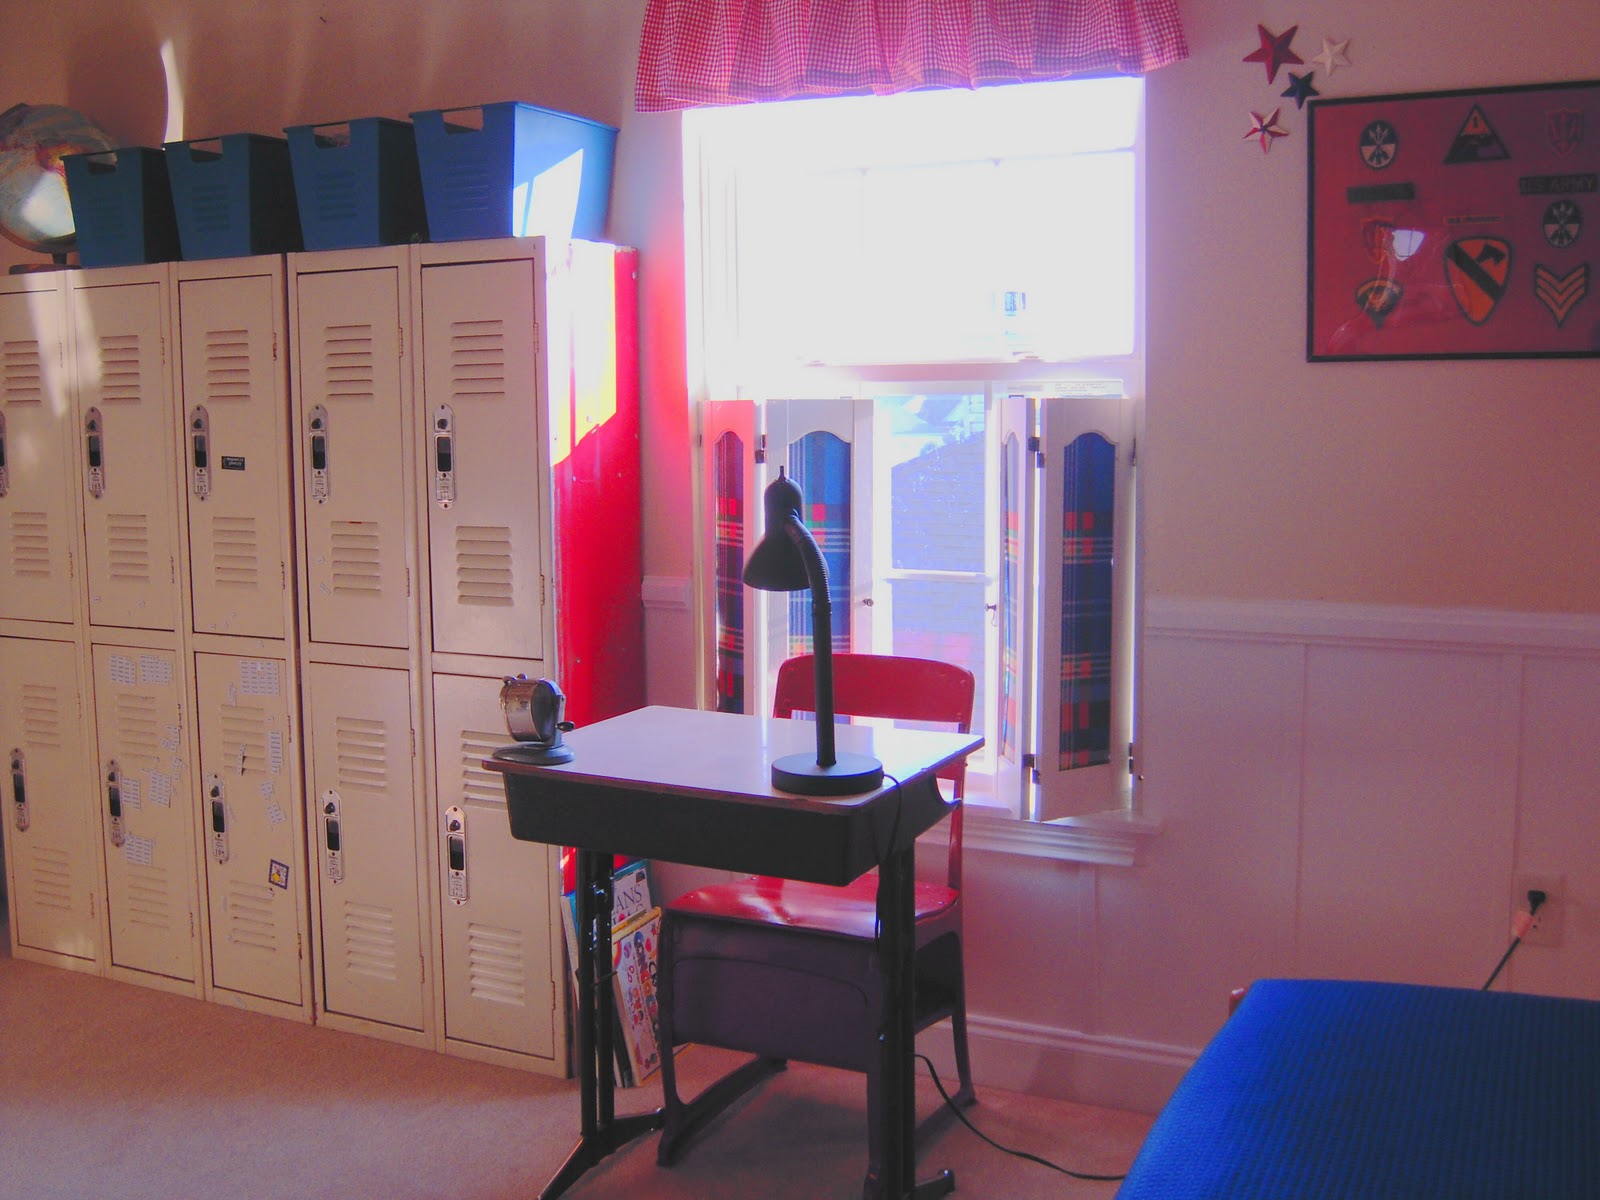
Here is the left side of Carson's room...
it got a little update of it's own.
It got shutters, a school desk and chair, his little goodwill
lamp and locker bins.
and of course, a new valance.
(well new from a yard sale for 2 bucks!)
and the right side....
(He got a new bean bag, which he LOVES,
and he also added new toys to his shelf which, right
now would be Charlie Brown and Lucy!)
:)
Here's one last before and after of his room...
Before...
After.....
So tell me what ya think!
:-)
Any questions?
Blessings and Hugs
Missy
I'm linking up to the following:
Before and After party@ thrifty decor chick
POPP @ Domestically Speaking